Celtic Knot Kits
This kit can also be used for mapping a knot that you intend to cord.What you need:
*A graphics program capable of opening more than one image at a time.
*My Celtic knot kit is available FREE but if you want to link, please
link to this page rather than to the kit. I seldom do anything noteworthy so I'd like credit if
someone actually likes the idea. This could probably be done as tubes by someone more advanced than I.
*The basic directions are located at Marc Wallace's site. (Site is no longer extant, see basic
instructions at bottom of this page.) I used his directions and then created the kit to facilitate
translating the resulting knots to my web site. My directions are to familiarize you with using the
pieces.
In the kit, you will find:
*a small graphpaper-type background
*a short straight line (diagonal)
*a corner
*a short curve
*a long straight line (horizontal) and
*an "overpass"
*(there is also a blank square for erasing mistakes)
I won't go into the rules for celtic knots on this page. The directions here are for the KITS.
The basic directions for the kit are:
*Match the red dots and blue lines to their counterparts on the graph.
*Take care to note that only one piece has a corner formed by two blue lines.
*Only one piece has blue lines on opposite sides.
*One piece has two red dots and one blue line.
*One piece has a red dot in the center.
Much of this will depend on which program you are using. I have started you off with an 8x8 grid, which is considered a 4x4 knot grid because it takes four CELLS to make a SQUARE. The grid does not have to be square (and should not be) but the minimum size for height or width is three squares.
Open the graph background, DUPLICATE it, close the original and zoom in to
at least 200%. Fill in your guidelines according to Marc's directions. (This
formation is not considered good celtic knot form but shows all the situations
you will encounter.)
Open the first piece, 01bgshrtstrt, and copy it. Close
the original.
Look for the places on the graph that have two red dots with
no blue lines and paste the piece between the dots. When you have pasted to all
the places that look right, paste the piece one more time and rotate it 90
degrees. Copy it again. Now go paste it some more.
When you have all these pieces in place, go to the next
piece - 02bgcorner. This one won't be used much unless you put a lot of blue
lines perpendicular to the border. Again, copy, close the orginal, paste, rotate
and paste some more.
Except for the overpass, this piece and the remaining
ones will also have to be flipped or mirrored and rotated a total of 3 rotations
(counting the original: 4 directions, flip, and 4 more directions).
Now you
can work on the curves. There are almost as many curves as there are diagonals
and you'll start seeing places where you missed a diagonal. It's easier to go
through the pieces in order a 2nd time than to try to figure out which piece you
need and which direction it needs.
The last building block is the long straight piece.
Now the outline is complete and we are about half way
there. The overpass should be applied according to Marc's directions. Match the
center dot and the four blue dots on the edges.
Then rotate the piece and start on row 2.
Now you can erase your lines. Most programs have a color
replacement tool. Choose your eyedropper and sample the white for the background
and sample the red for the foreground. Set the color replacer to a small
diameter and replace the red outside the knot with white. Now you can change
your tool to a much larger size and replace the red inside the knot with purple
(pink?). Do the same for the dark blue and the light blue. If you want to change
the color of the knot, use your fill tool. (This is when you find out if you
actually have one knot or several.)
Here are some of the special effects I have added to the
basic outline.
Notes: The chrome knot was created with my
diagonal kit.
Instructions for the
diagonal kit. It's a lot different but you should
be able to use it once you have finished this first one.
The border for this page (top left corner on a small device) was created with my
extra small kit. Tedious work, but worth it. (Copy and
paste is a must.)
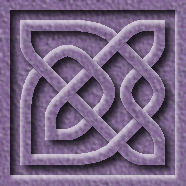
The purple knot was made with a kit for knots with
thinner lines, which has an extra piece to make long
curves.
If you have trouble with my directions, please give a holler.

A good example of a square grid with a single cord.
Since Marc's site is no longer available, I'm adding a few of his ideas here.
A good, basic rule is symetry - but not too much. You want to end up with one single long line that passes over and under itself and a rectangle produces more singles.
Guidelines must contain at least one red dot and should not touch the blue lines perpendicular to them (except the one under the red dot).
When applying guidelines, use symetry with an occasional non-symetrical line.
Apply the overpasses in alternating directions.
Presuming that the red dots are centers of rows - begin with row one and apply the overpass to each dot.
Continue with ODD rows 3, 5, 7, etc.
Rotate the overpass 90 degrees and - beginning with row 2, apply the overpass to each red dot.
Continue with EVEN rows 4, 6, 8, etc.
Some examples of Marc's guidelines are located here.