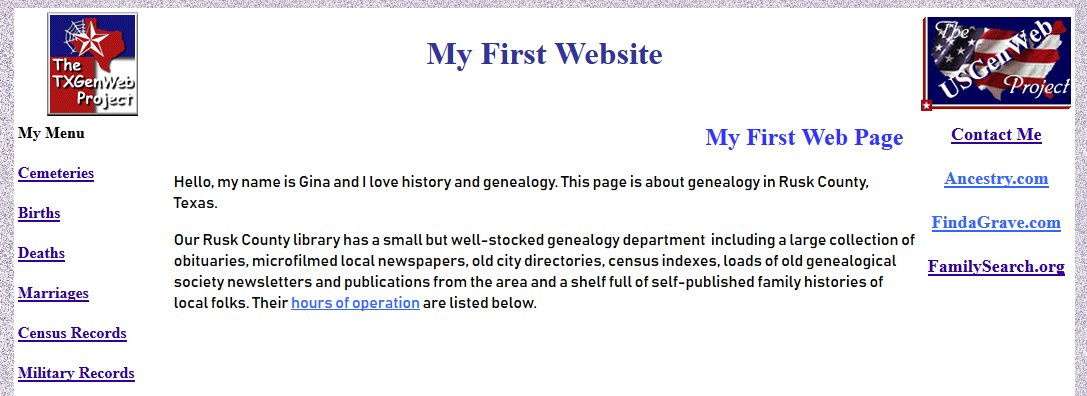
Adding A Site Menu to Your Page
When you have a lot of pages on your site, you need to decide on a way to link to them. For this tutorial, we'll build a vertical menu down the left side of our page.
- OPEN Composer and your practice page.
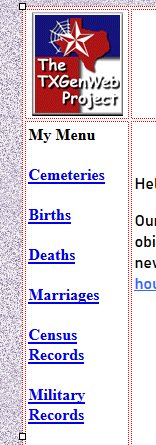
- In the second cell of the first column, HIGHLIGHT My Menu and make it bold then CLICK just after it and tap the Enter key. Since people are going to be clicking on these links and we don't have a lot of them, Enter again to skip a line. As your menu grows, you can choose to single-space it and enlarge the font. The next Entry will be a link to Cemeteries.
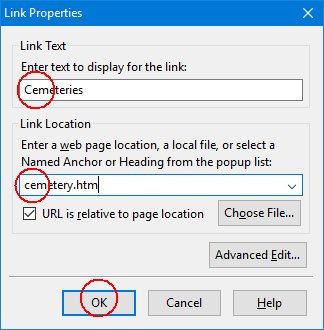
- CLICK the Link icon up top and TYPE
Cemeteries into the first box and cemetery.htm into the 2nd box. CLICK OK.
- ENTER twice again and add a link for Births at birth.htm
- Add a few more links to imaginary pages and the hard stuff is done.
- We have a great start for our menu but it's very narrow. Sometimes the links will have to wrap
when the Link text contains multiple words and especially when the words are long ones but it won't hurt a bit to widen this menu some.
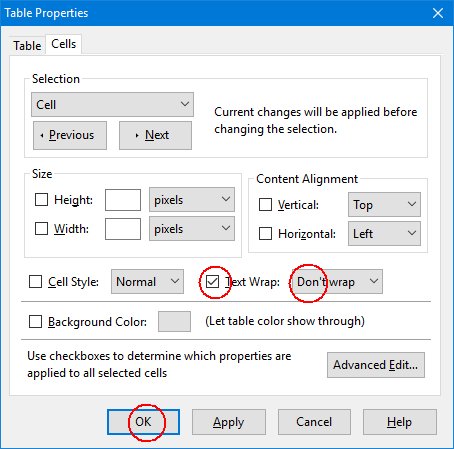
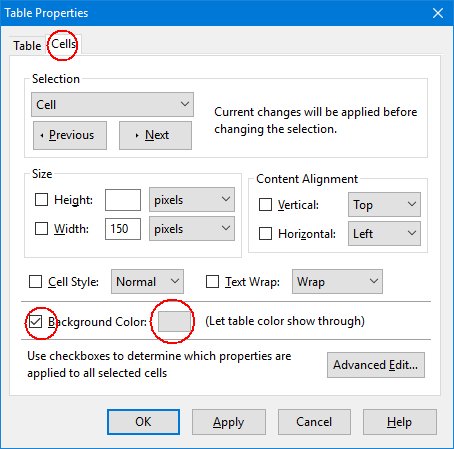
- The easiest way to change the size of a row or column is to CLICK inside it and CLICK the Table icon up top.
CLICK the Cells tab at the top of the pop up window. In this case, to let the browser decide the width of the column, simply
CLICK to CHECK Text Wrap and CHANGE it to 'Don't Wrap'.
CLICK OK.
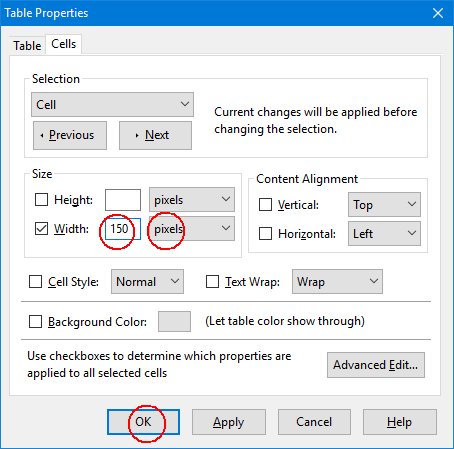
- But I want a little more space between my menu links and the text in the middle column, so I'm going to actually set a width for the column. I'm going to use PIXEL width so that width will remain constant. Everything on a computer screen is made up of colored dots - pictures AND text. Those dots are called pixels and they're the most commonly used measurement for height and width in page building (although other methods are now overtaking it).
- CLICK inside the first column and CLICK the Table icon.
CHANGE 'Don't Wrap' to 'Wrap'. CLICK the Width box and type in a number. It takes
some practice to recognize how many pixels will do what you want on YOUR particular computer and monitor but it should look the same to
everyone else. An easy way to make your first guess is to look at the images on the page. The USGenWeb logo on the right is setting the width
for that column. So I took a look (click the logo and click the Image icon) and that logo is 150 pixels wide, so I set the width of my left
column to 150 pixels. CLICK OK.
- Now I have plenty of space between my menu and the other text and my page LOOKS more balanced.
- We can also change the colors of our columns to emphasize that they contain different types of things. I still want my main column to be white but I want to change the outer columns.
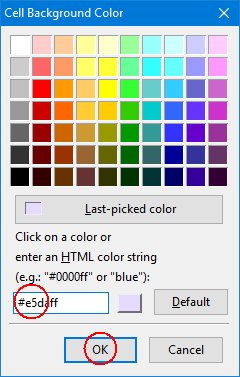
- I want a very pale purple or lavender for my menu but the lowest ready-made setting in the purple column is darker and bluer than what I want, so I'm going to use a custom color and type it into the window - #e5daff. CLICK here for some information on custom colors.
- CLICK inside the cell you want to change. CLICK the
Table icon. CHECK that you're on the Cells tab and CLICK the empty
color box beside Background Color.
- CLICK on the color that you want or TYPE the code for a custom color in the box. You can alternatively type the name of a color like blue BUT your
browser may not call a color the same thing as you - say, cornflower blue or violet. CLICK OK,
then CLICK OK on the first window. If you don't like the color you've chosen, try again.
- REPEAT this process for the column on the right, SAVE
your page and VIEW it in SeaMonkey.
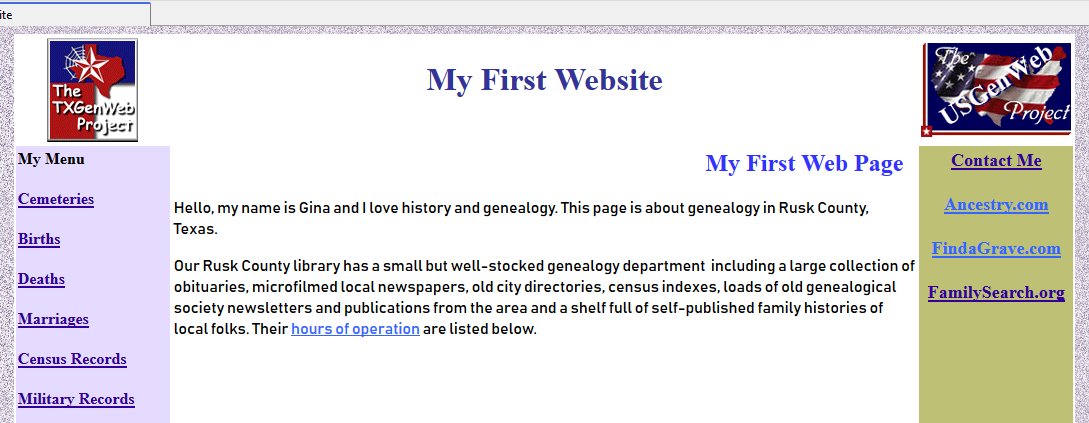
You created very nice page by practicing all the basics you need. I think it's time to learn how to upload it before we go to more advanced ideas.